Maintenance Instructions For Tylke Forceps
Recommended Steps in Cleaning, Sterilization & Maintenance of Instruments
Recommended Steps in Cleaning, Sterilization & Maintenance of Instruments
Immediately after use, rinse the instruments under warm (not hot) running water. Rinsing should remove all blood, fluids and tissue.
If not done immediately after rinsing, instruments should be submerged in a solution of water and neutral ph 7 detergent.
Instruments should be processed in the ultrasonic cleaner for the full recommended cycle time – usually 5 to 10 minutes. Place instruments with hinges, locks and other moving parts, in open position into the ultrasonic cleaner. Make sure the blades, handles do not touch other instruments.
All the instruments have to be fully submerged in the cleaning solution. Do not place instruments of dissimilar metals (stainless steel, chrome plated, copper etc.) in the same cleaning cycle.
Change solution frequently – at least as often as manufacturer recommends.
After ultrasonic cleaning, rinse instruments carefully under distilled water to remove ultrasonic cleaning solution.
Follow manufacturers’ recommendations but make sure instruments are lubricated between end of rinse cycle and start of sterilization cycle.
Most instrument manufacturers recommend ultrasonic cleaning as the best and most effective way to clean surgical instruments, especially those with hinges, locks and other moving parts. If ultrasonic cleaning is not available, observe the following:
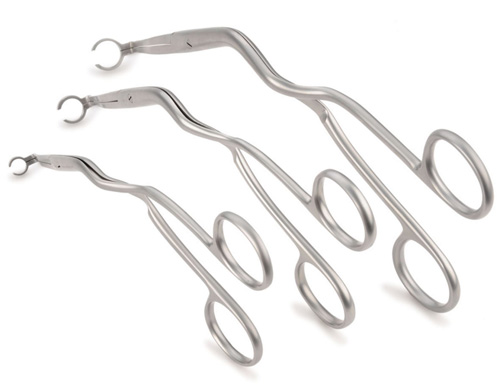
Immediately after the cleaning and rinsing operations surgical instruments should be carefully dried. All instruments with hinges, locks and other moving parts (“metal to metal” action) such as the Tylke forceps should be lubricated. Only use recommended surgical grade lubricants. Do not use industrial lubricants.
This is a good time to inspect each instrument for proper function and condition. Check and make sure that:
After rinsing, cleaning, drying, lubrication and inspection, instruments are ready for autoclaving. Put instruments up for autoclaving either individually or in sets. For individual instruments, disposable pouches are ideal. Make sure you use a wide enough pouch for instruments and are open in such a way that the instruments can be sterilized in an open/unlocked position.
For instrument sets, place instruments in designated instrument trays (usually of stainless steel, aluminum or special plastics). Place heavy instruments on bottom (if two or more instrument trays are required). Never lock an instrument during autoclaving. It will not be sterile as steam cannot reach the metal to metal surfaces. The instrument might develop cracks in hinge areas because of heat expansion during autoclave cycle. Never overload autoclave chamber, as pockets may form that do not permit steam penetration.
At the end of the autoclave cycle, and before the drying cycle, unlock autoclave door but do not open it more than a crack. Then run dry cycle for the period recommended by the manufacturer. If the autoclave door is opened fully before the drying cycle, cold room air will rush into the chamber, causing condensation on the instruments. This will result in water stains and might cause wet packs.
Most cold sterilization solutions render instruments sterile only after a 10 hour immersion. This prolonged chemical action can be more detrimental to surgical instruments than the usual 20 minute autoclave cycle. If the instruments need to be disinfected only, cold sterilization is good as disinfection will take place in only 10 minutes. But bear in mind the difference, disinfected instruments are basically clean instruments, but sterilized instruments will have no living organism on them.
Note: Above recommendations do not replace standard procedures in practice in your hospital, surgical center or clinic. The steps mentioned above mayor may not be enough for ensuring proper care and sterility of instruments.